

In this post, we will explain how to interface 16x2 LCD with Arduino Uno board using I2C interface. For this we need the following boards:
- Arduino Uno board
- Jumper Wires: Link
- PCF8574 I2C GPIO Expander board: Link
- USB Type A to USB Type B cable: Link
The below block diagram shows how the boards are interfaced:

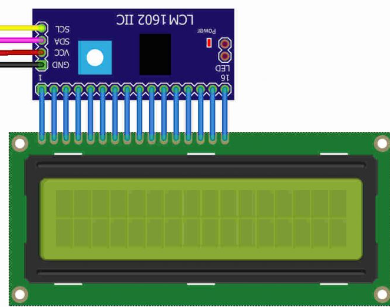
About PCF8574 based I2C Module for 16x2 Character LCD:
PCF8574 I2C chip converts I2C serial data to parallel data for the LCD display. PCF8574 I2C modules are currently supplied with a default I2C address of either 0x27 or 0x3F. To determine which version you have check the black I2C adapter board on the underside of the module. If there a 3 sets of pads labelled A0, A1, & A2 then the default address will be 0x3F. If there are no pads the default address will be 0x27. PCF8574 I2C modules has a contrast adjustment potentiometer on the. This may require adjusting for the screen to display text correctly.
16x2 Alphanumeric LCD:
The below diagram shows the pin out of the 16x2 LCD.

Connectivity:
Using jumper cables connect the 16x2 LCD to PCF8574 GPIO Expander board. The connections are one-to-one parallel connections. The connectivity is as below:
I2C connections on the Arduino Uno:
The below figure shows the I2C signals on the Arduino Uno board. These I2C signals are connected to the PCF8574 GPIO expander board.

Powering the entire set up:
The entire set up is powered from Arduino Uno board 5V. Arduino Uno in turn is powered by the computer using USB cable. Here is the view of complete set up.

We have a video in your YouTube channel explaining the entire connectivity.
We have the code saved in our GitHub page.
 ]]>
]]>


0 Comments